Category Archives: pies and tarts

Chocolate Whoopie Pies with Vanilla Cream-Cheese Filling

Standard

IMG_3691

Oh. My. Gosh.

Whoopie pies.

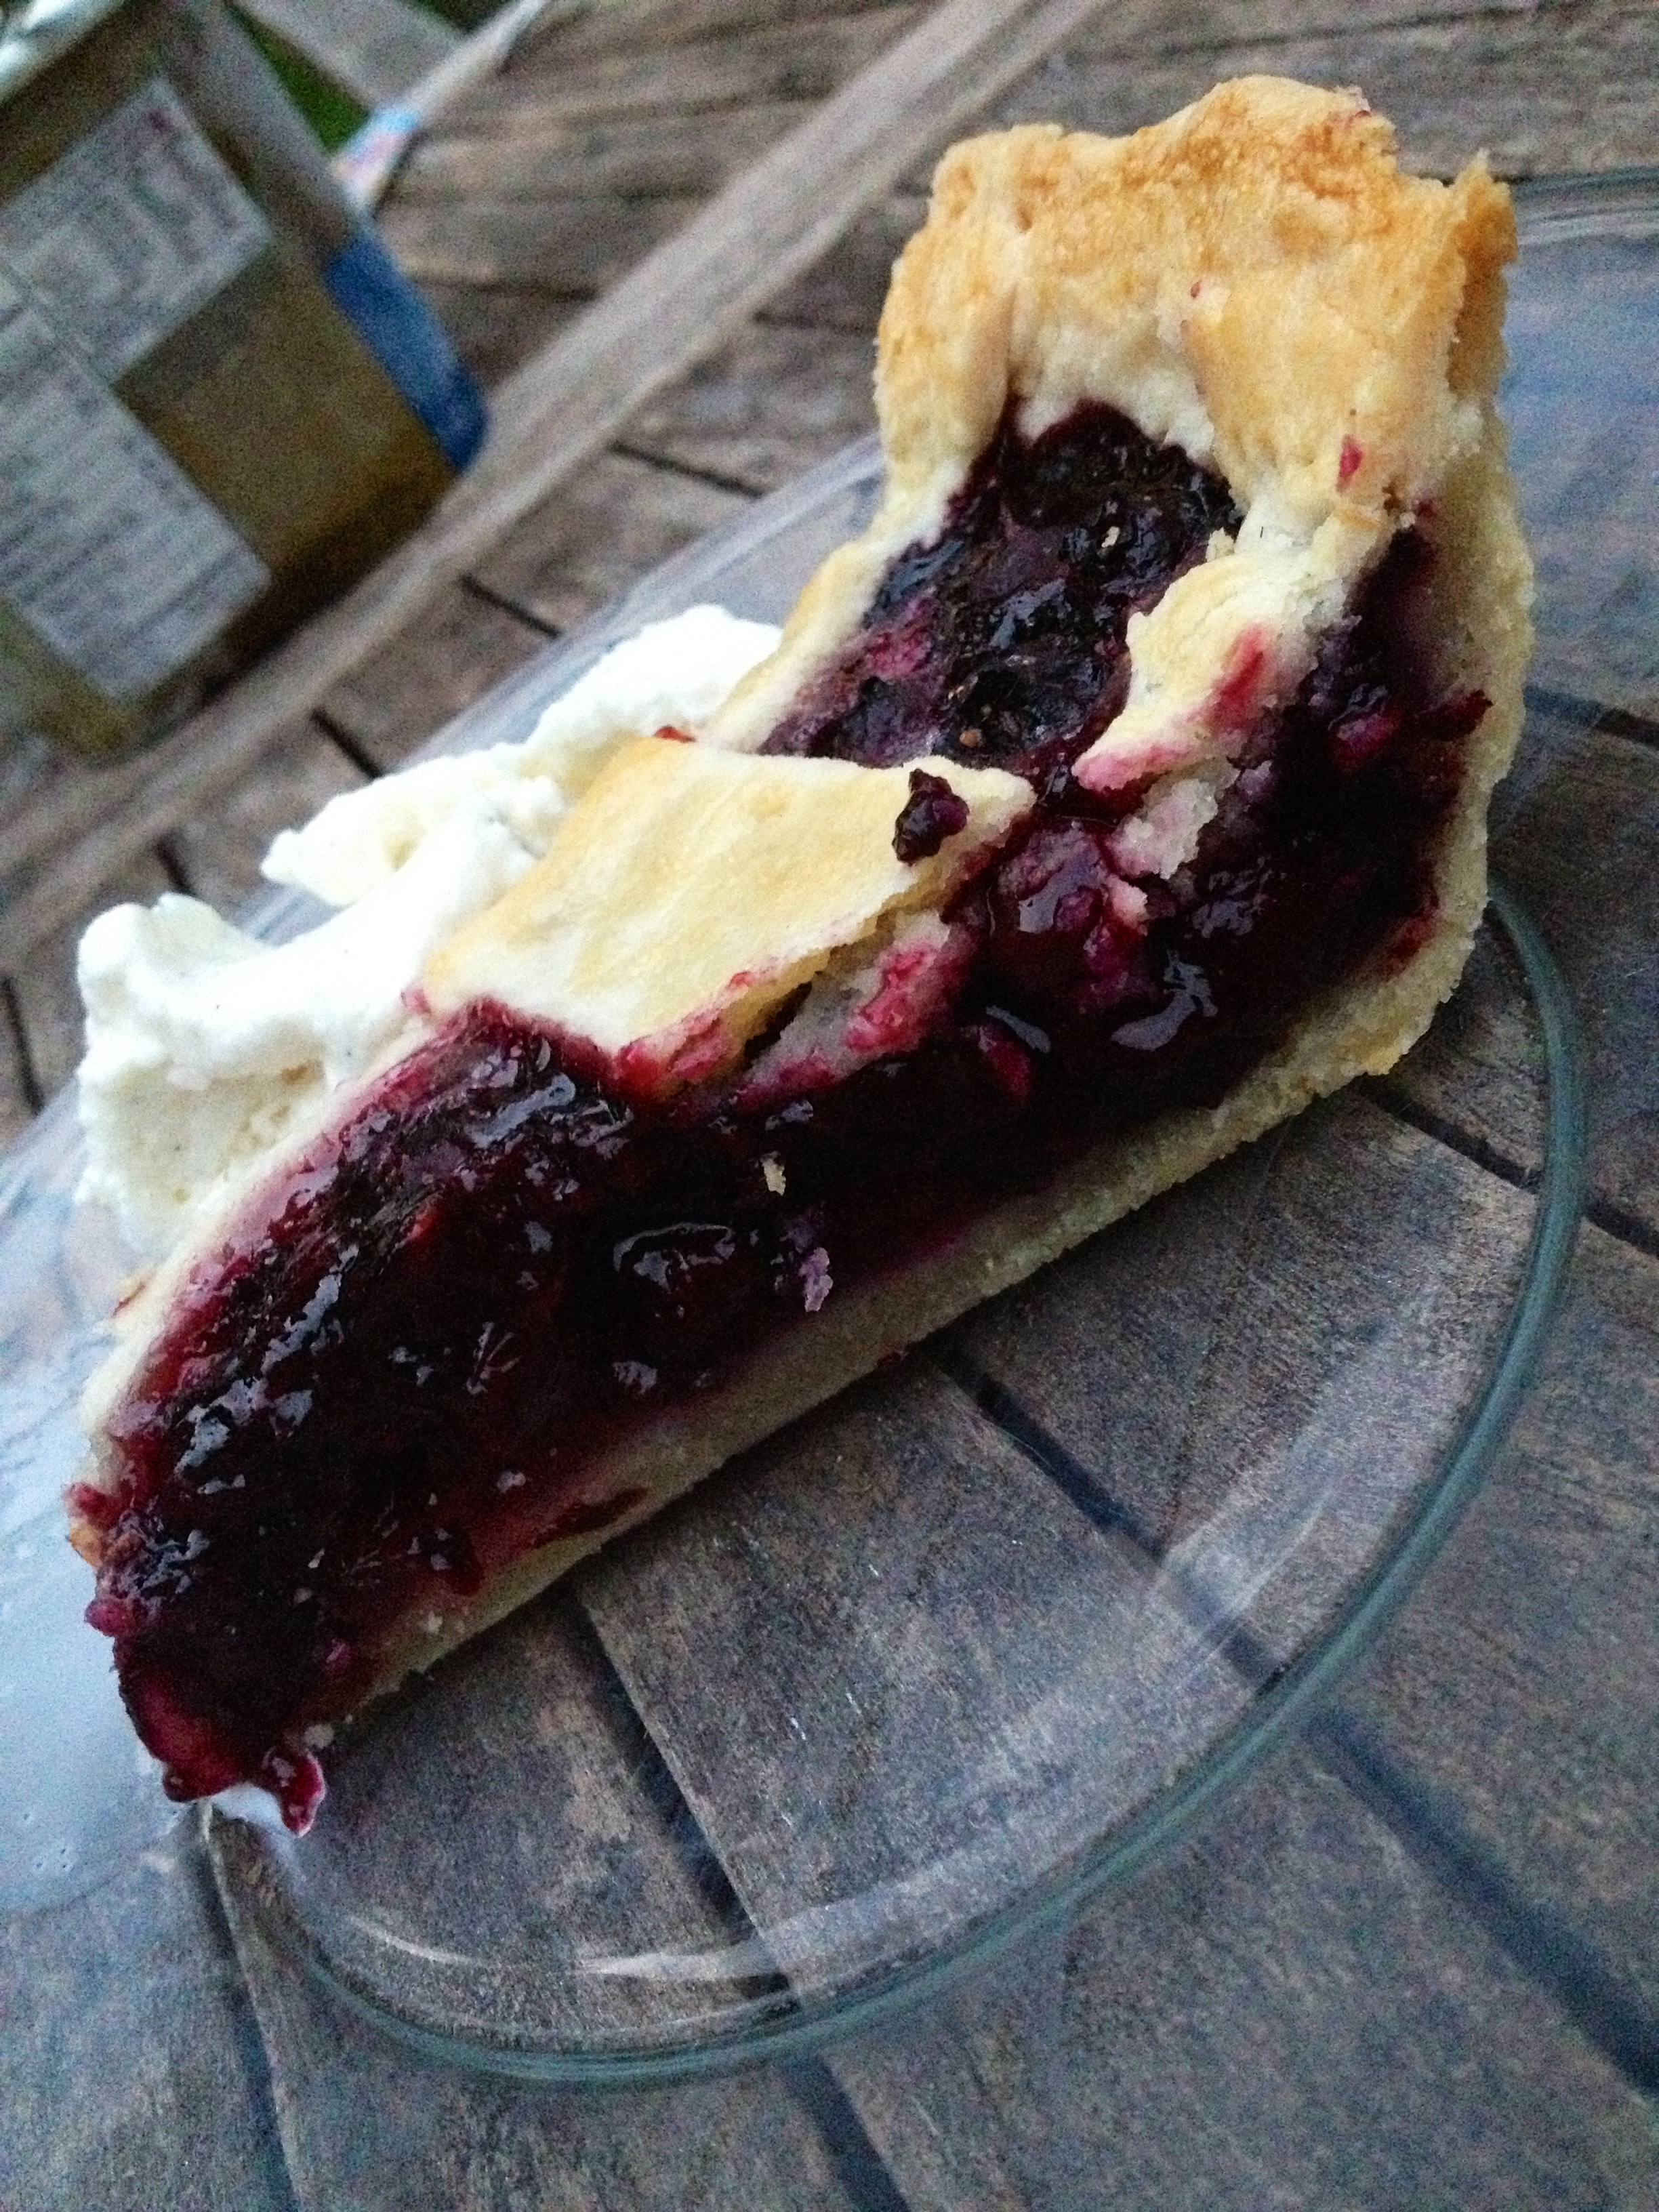
You don’t know what they are? Let me enlighten you. They are basically two cakey cookies, with a light, creamy frosting in between. There are many variations of whoopie pies; I even have a full recipe book of them. However, I just wanted some chocolate cream-cheese whoopie pies. Plain and simple. Yummy. Warms the soul. Ya know. I also figured doing something outlandishly crazy would probably not be the best idea when I’m not even eating the majority of the product. Indeed, these were not for me to merely munch on in my spare time. They were for my wonderful team in “celebration” of the end of rowing preseason. The sport is hard enough on the water, so when you give the coaches two weeks to torture us with land-training, it’s very…let’s just say I couldn’t quite feel my legs for the first couple of days! So as a last hoorah with school starting Tuesday and all (there goes my time for experimenting in the kitchen. It’s really bumming me out, actually) I decided to make whoopie pies for the team. It also worked out perfectly because it was a nice reward at the end of practice after a surprise test (think of a rowing test as a time trial, except much more monotonous and much more detailed in every single thing you do). So. Yay chocolate whoopie pies. Also shout-out to Georgia who let me take a picture of her whoopie pie, as seen above. ;D

IMG_3680

I found this recipe on Food Network.com. I actually used (and modified) one recipe for the pies then used another for the filling. I’ll post the original links and the end of the post. I modified the whoopie pies by first of all halving the recipe (the original recipe would have made 76 individual whoopie pies. Sorry, but I don’t have the time or budget to do that, nor do I have 76 people to whom I can give whoopie pies). If you go to the original recipe, you will also see that 1 1/2 tbs of baking soda are said to be needed. This is a typo. It should be 1 1/2 teaspoons (tsp) not tablespoons (tbs). So I also adjusted and halved that. To give the pies more of a kick, I also added some instant espresso and some chocolate chips for taste and texture.

This recipe makes about 36 whole whoopie pies that are about the size of a baseball.

Adapted from Moody’s Diner featured on Foodnation with Bobby Flay and Food Network Magazine.

Ingredients:

For pies:

  • 3 cups all purpose flour
  • 1 cup unsweetened cocoa powder
  • 3/4 tsp baking soda
  • 1/2 tsp salt
  • 3/4 tsp instant espresso powder
  • 1 1/2 cups sugar
  • 1/2 cup butter
  • 2 eggs
  • 1/4 cup veggie oil
  • 1 1/2 tsp vanilla extract
  • 1 1/2 cups milk
  • 1 cup chocolate chips

For filling:

  • 8 ounces cream cheese, at room temp
  • 3 tablespoons unsalted butter, softened
  • 2 1/2 cups confectioners’ sugar, sifted
  • 1 vanilla bean, halved lengthwise and seeds scraped

Possible add-ons if you’re feeling adventurous:

  • Crushed vanilla wafer cookies
  • Crushed graham crackers
  • Crushed Oreos
  • Chopped nuts (pecans would probably be best)
  • Toasted coconut
  • Sprinkles of any sort
  • Mini chocolate chips

No, you do not need all of these toppings. I actually just used the vanilla wafer cookies. Use however many or however little you want.

Let us begin.

First, the cakes-

Preheat oven to 350 degrees F, or preheat a convection oven to 315 degrees F.

In a separate bowl, combine all of the dry ingredients (flour, cocoa powder, baking soda, salt, and espresso powder).

In a large bowl of an electric mixer, beat the sugar and butter until creamy and fluffy. And eggs and beat until well combined. Add the oil and vanilla and beat again. (I feel like singing Michael Jackson’s “Beat it” because of the number of times I said “beat” in the past sentences)

.Add half of the dry mixture to the egg mixture and beat or stir to blend. Add 3/4 cup milk and beat again. Add the remaining dry mixture and beat until incorporated. Add the remaining 3/4 cup milk and beat until blended. Stir in the chocolate chips

With a spoon, scoop out the batter onto baking sheets. I did about a tablespoon per pie, maybe a little more. With these sized whoopie pies, I was able to get 12 pies on an 11ishx16ish baking sheet. So unless you have a super huge oven and a gazillion baking sheets, you will need to do multiple rotations for baking them. But it’s worth it. Bake for about 6:30-7 minutes, or until a knife stuck in the middle of a pie comes out with moist crumbs attached or clean. Really be careful with the baking time; they go from nice and moist to overbaked and dry in the matter of a minute.

IMG_3670  IMG_3671

Once out of the oven, let cool slightly on the baking sheet, then transfer to wire rack to cool COMPLETELY before filling

IMG_3672

Speaking of filling….

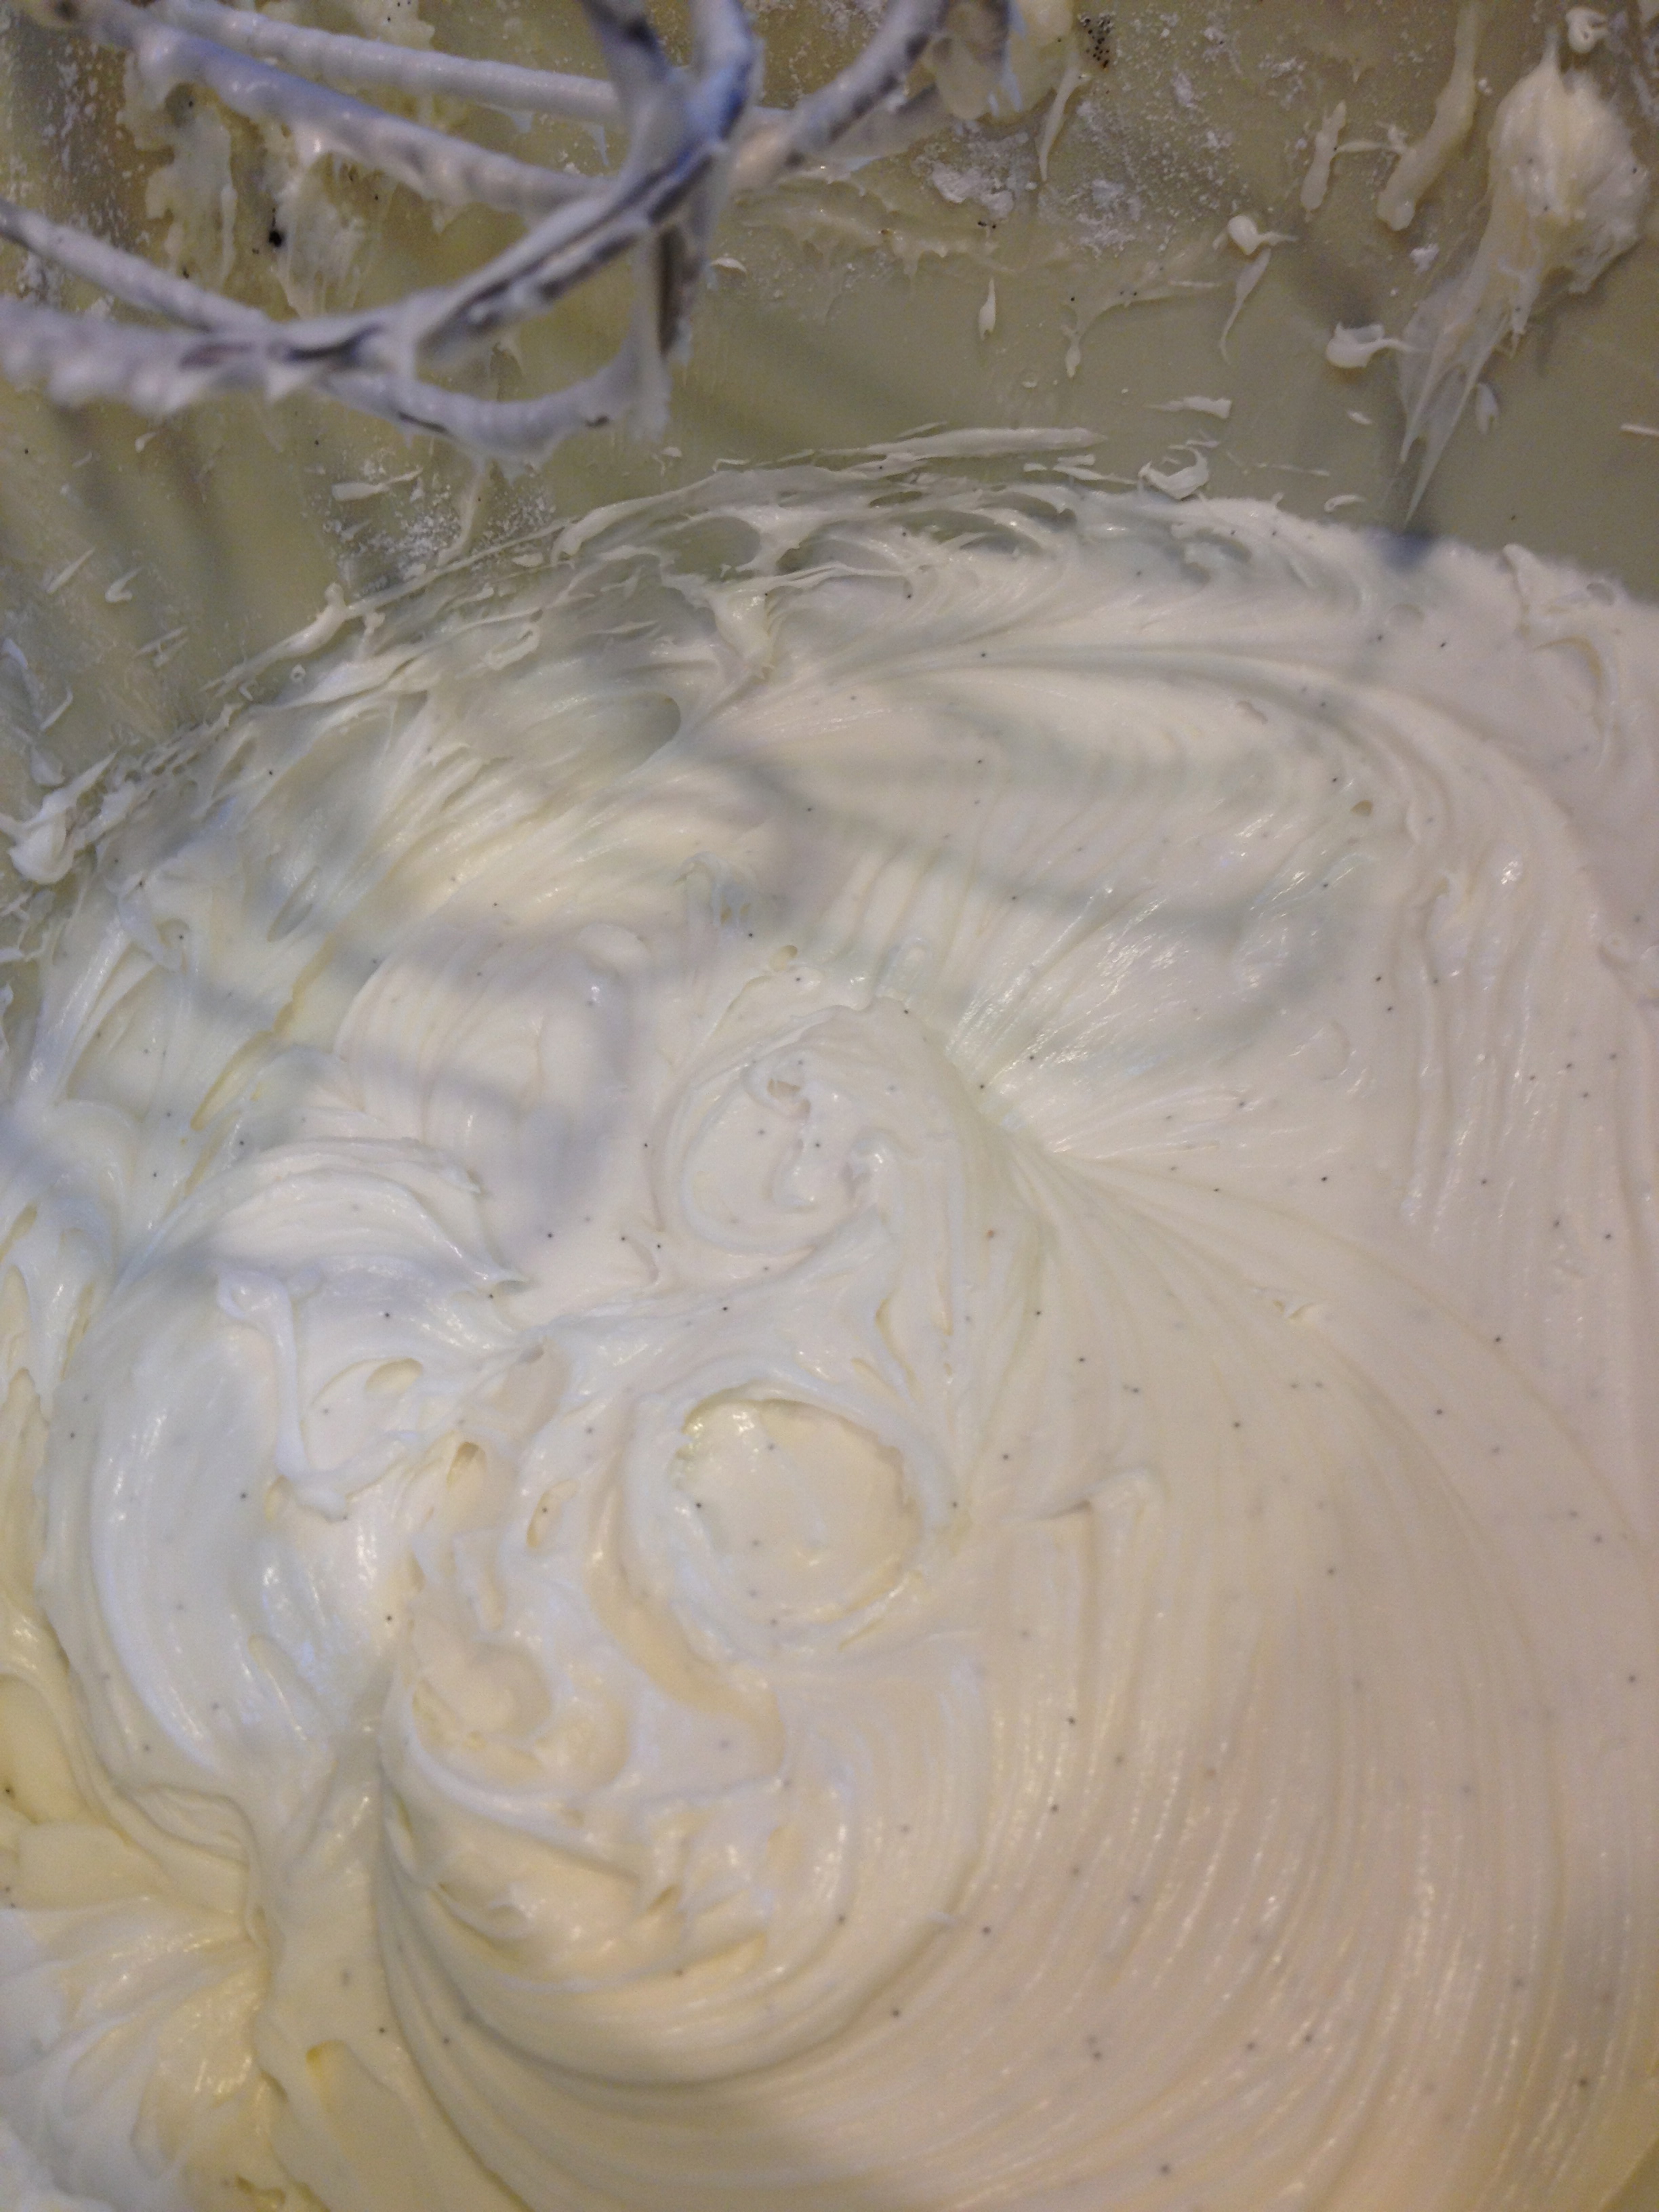
Procedure for vanilla cream-cheese filling

Beat the cream cheese and butter with a mixer until smooth. Beat in the confectioners’ sugar and vanilla seeds. Sandwich a tablespoonful of filling between 2 cookies; repeat with the remaining cookies and filling. Roll edges in add-ons. Refrigerate 30 minutes before serving.

IMG_3673  IMG_3675  IMG_3679

Enjoy!

pie: http://www.foodnetwork.com/recipes/foodnation-with-bobby-flay/whoopie-pies-recipe/index.html

filling: http://www.foodnetwork.com/recipes/food-network-kitchens/red-velvet-whoopie-pies-recipe/index.html?ic1=obinsite

Alton Brown’s Frozen Blueberry Pie

Standard

IMG_3602

I went blueberry picking!

IMG_3605

…I picked a lot of blueberries.

12 lbs to be exact. It was extremely fun (even though my mom told me to wear a black shirt so I wouldn’t get stained by blueberries. Bad idea. We were in the sun the whole time) AND extremely rewarding. Blueberries are awesome because you can eat them fresh or frozen, in a muffin, in a pie, in a coffee-cake, in pancakes, in waffles, as a jam….you get the picture. So I made a pie with my grandma’s versatile pie crust recipe and Alton Brown’s frozen pie recipe. The reason it is frozen is because you make it let’s say the night before an occasion, then you pour the filling into a pie mold then you let it freeze for 6-8 hours or over night THEN you pop it out and bake it! It’s awesome because it’s easy and it’s able to be made in advance.

IMG_3631   IMG_3628

And it. Was. Amazing. The filling didn’t do any unnecessary oozing when cut; it’s actually easy to cut a slice! And beside a scoop of vanilla ice cream…

You must try this. And no, you don’t need to go blueberry picking and get 12 lbs of blueberries to do it. Without further ado:

Ingredients-

For Pie Crust:

  • 1 1/2 sticks butter, cubed
  • 1/4 cup Crisco, cubed
  • 2 1/3 cup all purpose flour
  • 1 tsp salt
  • 6 tbs ice water

For Filling

  •  4 cups of blueberries
  • 1/2 cup sugar
  • 1/8 teaspoon kosher salt
  • 5 tbs of tapioca flour/starch
  • 1 tablespoon fresh orange juice
  • 1 teaspoon orange zest
  • 1 egg yolk whisked with 1 teaspoon water

How to:

For the filling-

Wash the berries and pat dry. Mash up half of the blueberries in a small bowl.

In a medium bowl, whisk together the sugar, salt and tapioca flour/starch. Add the mashed blueberries, orange juice and orange zest and stir to combine. Let the mixture sit for 15 minutes. Fold in the whole berries.

Line a 9-inch pie plate with aluminum foil. Place the blueberry mixture into the foil and place in the freezer until solid, approximately 6 to 8 hours.

Once the filling is frozen, remove from the aluminum foil and wrap in plastic wrap and store in a freezer bag for up to 3 months.

IMG_3617    IMG_3618

IMG_3619   IMG_3620

For pie crust and baking-
Preheat the oven to 325 degrees F.

For the pie crust-

Combine the flour, salt, crisco, and butter in a food processor. Pulse until the mixture is crumbly. Add the water and process just until a ball forms. Remove from processor and wrap dough in saran wrap and put in the fridge for at least 15 minutes, or until workable. When ready, make sure you have a lot of wax paper and a lot of flour. Rip two big pieces of wax paper and put them on top of each other so that you have a square surface. Lightly flour. Get the dough out of the fridge and unwrap. Cut a third of it off and place back in the fridge. Pound down the remaining dough with a rolling pin until its a bit flatter to work with. Lightly flour the surface and rip another piece of wax paper and place on top. Roll out the dough in a circular fashion until it is about 3/16 of an inch thick. Or until you know that when you invert it into the pie pan, the dough reaches the lip of the pie pan. Which brings me to the next task: Place a 9 inch pie pan face down on the dough. Slide one hand under the dough to the center of the pie pan. Invert the dough into the pie pan. Once flipped, make sure dough is pressed down against pan in all places. Trip excess of crust and throw in the fridge with the remaining dough. Now, this is the important part: stab all of the dough with a fork. Seriously. My Grandma says she NEVER uses pie weights; just stab it to death with a fork.

IMG_3621    IMG_3622

With the remaining dough, roll it out in the same fashion, but more lengthwise so you can cut 6 equal strips of dough to form the basket-like structure. Remove the frozen pie filling from the freezer and place into the prepared dough in the pan. Lightly brush the edge of the crust with the egg yolk. Lay 4 strips of dough across the top of the filling horizontally, leaving an even amount of space in between each strip. Fold back 2 alternating strips and lay down another strip in the middle of the pie, perpendicular to the other strips. Return the strips that are laid back to their original position. Next, fold back the other 2 strips and lay down a strip to the left of the center perpendicular strip. Return the strips that are laid back to their original position and repeat on the other side of the perpendicular strip, folding back the same 2 strips as you did on the other side. Once you have a lattice, brush all the strips of dough with the egg yolk, trim excess dough and pinch strips and edge of crust in order to seal. Place on the bottom rack of the oven and bake for about 1 hour 15 minutes. The pie should be bubbling lightly around the edges. If the lattice is not browned enough in the center, place under the broiler for 1 to 2 minutes.

IMG_3624    IMG_3626

Place the pie on a rack and allow to cool to room temperature before serving, approximately 1 1/2 to 2 hours.


IMG_3630    IMG_3632

Place the pie on a rack and allow to cool to room temperature before serving, approximately 1 1/2 to 2 hours.

Devour with vanilla ice cream.

Here’s Alton Brown’s original recipe!

http://www.foodnetwork.com/recipes/alton-brown/frozen-blueberry-pie-recipe/index.html