Tag Archives: chocolate

Dark Chocolate Crackle Cookies

Standard

Screen Shot 2013-12-21 at 4.56.00 PM

So this holiday season, despite the workload, I wanted to make cookies for people to show how much I appreciated them. So, I put together tiny chinese takeout boxes (that were Christmas patterned) of four cookies: classic peanut butter cookies, pumpkin biscotti, classic sugar cookies, and these dark chocolate crackle cookies. These cookies are a twist on regular chocolate-chocolate cookies; instead of using white sugar, it only uses brown sugar in the batter. Instead of being overly sweet, white sugar on the outside compliments the cookie. The cookie also uses orange zest, which gives a tiny kick and a fresh, citrusy taste. These cookies are perfect for a more mature palette, one that craves something a tiny bit different than the classic chocolate chocolate cookie.

Adapted from Abigail Johnson Dodge from Fine Cooking

Ingredients

  • 2-1/2 cups all-purpose flour
  • 1 tsp. baking soda
  • 1/4 tsp. table salt
  • 8 oz. (1 cup/2 sticks) unsalted butter, at room temperature
  • 2 cups firmly packed light brown sugar
  • 2 oz. (2/3 cup) natural, unsweetened cocoa, sifted if lumpy
  • 2 tsp. finely grated orange zest
  • 1 tsp. pure vanilla extract
  • 3 large eggs
  • 8 oz. bittersweet chocolate, melted and cooled until barely warm ( actually used semisweet and those worked as well)
  • 3/4 cup (4 oz.) chopped chocolate (white, bittersweet, or semisweet, or M&M’s! hehe)
  • 1/3 cup granulated sugar; more as needed

Procedure:

Position a rack in the center of the oven and heat the oven to 350ºF. Line three large cookie sheets with parchment or nonstick baking liners, like the silpat.

In a bowl, mix together the flour, baking soda, and salt. In another bowl, beat the butter, brown sugar, cocoa, orange zest, and vanilla until well combined, about 4 minutes. Add the eggs one at a time, beating briefly between additions. Add the cooled chocolate (make sure it’s cooled all the way! You don’t want those eggs to curdle, now do ya?) and mix until blended, about 1 minute. Add the dry ingredients and mix on low speed (so you don’t have a flour explosion!) until almost completely blended, about 1 minute. Add the chopped chocolate and mix until blended, about 15 seconds. Shape the dough into tiny balls, about 2 tsp-1 tbs big.

Pour the granulated sugar into a tiny bowl. Roll each ball in the sugar and set the balls about 1-1/2 inches apart on the prepared cookie sheets. Bake the cookies 11 to 12 minutes, maybe a little more if you’re doing more than one sheet at a time. They’re done when they crackle a little bit on the top, like pictured. Let the cookies cool on the sheet for 5 minutes before transferring them to a rack to cool completely.

Enjoy! Here’s the link to the original recipe:

http://www.finecooking.com/recipes/dark-chocolate-crackles.aspx?nterms=112342,50060

Mocha Slice Cookies from Martha Stewart

Standard

Screen Shot 2013-11-29 at 6.25.48 PM

Look at these little dudes.

Chocolatey bites of amazingness with a kick of coffee flavor jam packed into every cookie. Chocolate and coffee; sounds good for hungry rowers (although to be quite frank, any food is good for hungry rowers. I take food to practice, and it is gone within 5 minutes. poof!). Although, as mentioned in my previous post, I forgot to take the cookies out! So, I’m left with a bunch of mocha slice cookies. But that’s okay, because they’re small enough to serve as a tiny taste of something sweet, and they aren’t heavy. Make these cookies big or small, they’ll be perfect to satisfy a chocolate craving at any time of day. I found this on Yummly, which found this on Martha Stewart. I’ll post the original link down at the bottom. Now, without further ado……

Ingredients:

  • 1 1/2 cups all-purpose flour, plus more for work surface
  • 3/4 cup unsweetened cocoa powder
  • 1/4 teaspoon salt
  • 2 tablespoons instant espresso powder
  • 1/4 teaspoon ground cinnamon
  • 1 1/2 sticks unsalted butter, softened
  • 1 cup granulated sugar
  • 1 large egg
  • 1 teaspoon pure vanilla extract
  • 1/2 cup mini chocolate chips

How to:

Mix together flour, cocoa, salt, espresso powder, and cinnamon into a large bowl; set aside. In another bowl, beat butter and sugar until pale and fluffy. Beat in egg and vanilla. Reduce speed to low so you can add flour mixture in without it spewing all over you. Unless you want to get into a flour fight (which I’ve done).  Mix until just combined. Stir in chocolate chips.

Turn out dough onto a lightly floured surface; roll into a 2-inch-diameter log. Wrap in saran wrap. Refrigerate until firm, at least 1 hour or up to overnight. Or, you could just keep them in the freezer until you need to bake them, which is what I did. I bet they’d last up to two weeks when stored in the freezer, but don’t take my word for it.

Preheat oven to 350 degrees. Unwrap log, and let soften slightly at room temperature, about 5 minutes. . Cut log into 1/4-inchthick rounds. Space 1 inch apart on baking sheets lined with parchment paper. Bake until centers are set, about 10 minutes. They should be soft, but not gooey soft. Don’t try to bake these until they get solid: THEY WILL BURN (trust me). Transfer to wire racks; cool completely. Store in airtight containers at room temperature up to 2 days.

Recipe makes…a lot of small little cookies.

Here’s the original recipe:

http://www.marthastewart.com/340252/mocha-slice-cookies?search_key=mocha%20slice%20cookies

Screen Shot 2013-11-29 at 6.25.41 PM

Eat up!

Chocolate Chocolate Cake

Standard

Screen Shot 2013-11-02 at 9.48.12 PM

“All I want is chocolate cake with chocolate frosting and vanilla ice cream!!!”

yada yada yada. This is what I’ve been hearing from my mother since her birthday on October 17th.

And unfortunately, I have not had time to make one! This is due to the fact that I have had a regatta every single weekend in October. I haven’t had a second to breath (or blog)!

Screen Shot 2013-11-02 at 9.49.47 PM

Luckily, things are now calming down as the fall season is coming to a close. Unfortunately, that means winter season is beginning…but that’s getting ahead of myself! Today, I had time to make my mom a chocolate cake with chocolate frosting. The best part is, is that this cake is stupid easy to make. You literally throw all the ingredients in a bowl, bake it, and boom it’s done. This cake is extremely moist; it soaks in all of the frosting and ice cream. It’s the perfect cake for birthdays or dinner parties because it tastes complicated, but it’s so simple!

Cake recipe from Hershey’s Chocolate Cookbook

Hershey’s “Perfectly Chocolate” Chocolate Cake

Ingredients:

  • 2 cups sugar
  • 1 3/4 cups all purpose flour
  • 3/4 cup cocoa
  • 1 1/2 tsp baking powder
  • 1 1/2 tsp baking soda
  • 1 tsp salt
  • 2 eggs
  • 1 cup milk
  • 1/2 cup veggie oil
  • 2 tsp vanilla extract
  • 1 cup boiling water

Directions!

Preheat oven to 350 F. Grase and flour two 9 inch round baking pans.

Stir together sugar, flour, cocoa, baking powder, baking soda, and salt in LARGE bowl. Add eggs, milk, oil, and vanilla. Beat on medium speed of mixer for about 2 minutes. Stir in the boiling water. The batter will be really thin, but don’t worry! It’s supposed to be like that. Pour the batter evenly into the prepared pans.

Bake 30-35 minutes or until a toothpick/knife inserted into the centers comes out clean. Cool for 10 minutes in pans, then flip onto wire racks. COOL COMPLETELY BEFORE FROSTING.

Chocolate buttercream frosting- from Magnolia’s Bakery (and found on Baking Up Chaos blog- link below!)

Ingredients:

  •  1 1/2 cups (3 sticks) unsalted butter, softened
  •  2 tablespoons milk
  • 9 ounces semisweet chocolate, melted and cooled to room temperature
  • 1 teaspoon vanilla extract
  • 2 1/4 cups confectioners’ sugar, more or less. Depends on how thick/sweet you want your frosting

Directions-

First, melt the chocolate by assembling a double boiler. Heat on low until chocolate is smooth and creamy; about 8 minutes. Keep an eye on it so the chocolate doesn’t burn! In a large bowl, beat the butter until creamy. Add the milk, beat until well incorporated. Add the chocolate (MAKE SURE IT IS ROOM TEMPERATURE. Otherwise it will melt the butter and you will have chocolate buttercream soup!), mix until chocolate is evenly distributed. Add vanilla extract and beat. Then, add the confectioners sugar- GRADUALLY. I used about 2 cups, but it honestly varies with desired consistency. Once all of the sugar is mixed in, assemble the cake and add vanilla ice cream and you have yourself dinner for the next three days!

Here’s the link to “Baking Up Chaos”

http://bakingupchaos.blogspot.com/2008/11/magnolia-bakerys-chocolate-buttercream.html

Screen Shot 2013-11-02 at 9.49.36 PM

Enjoy!

Chocolate Whoopie Pies with Vanilla Cream-Cheese Filling

Standard

IMG_3691

Oh. My. Gosh.

Whoopie pies.

You don’t know what they are? Let me enlighten you. They are basically two cakey cookies, with a light, creamy frosting in between. There are many variations of whoopie pies; I even have a full recipe book of them. However, I just wanted some chocolate cream-cheese whoopie pies. Plain and simple. Yummy. Warms the soul. Ya know. I also figured doing something outlandishly crazy would probably not be the best idea when I’m not even eating the majority of the product. Indeed, these were not for me to merely munch on in my spare time. They were for my wonderful team in “celebration” of the end of rowing preseason. The sport is hard enough on the water, so when you give the coaches two weeks to torture us with land-training, it’s very…let’s just say I couldn’t quite feel my legs for the first couple of days! So as a last hoorah with school starting Tuesday and all (there goes my time for experimenting in the kitchen. It’s really bumming me out, actually) I decided to make whoopie pies for the team. It also worked out perfectly because it was a nice reward at the end of practice after a surprise test (think of a rowing test as a time trial, except much more monotonous and much more detailed in every single thing you do). So. Yay chocolate whoopie pies. Also shout-out to Georgia who let me take a picture of her whoopie pie, as seen above. ;D

IMG_3680

I found this recipe on Food Network.com. I actually used (and modified) one recipe for the pies then used another for the filling. I’ll post the original links and the end of the post. I modified the whoopie pies by first of all halving the recipe (the original recipe would have made 76 individual whoopie pies. Sorry, but I don’t have the time or budget to do that, nor do I have 76 people to whom I can give whoopie pies). If you go to the original recipe, you will also see that 1 1/2 tbs of baking soda are said to be needed. This is a typo. It should be 1 1/2 teaspoons (tsp) not tablespoons (tbs). So I also adjusted and halved that. To give the pies more of a kick, I also added some instant espresso and some chocolate chips for taste and texture.

This recipe makes about 36 whole whoopie pies that are about the size of a baseball.

Adapted from Moody’s Diner featured on Foodnation with Bobby Flay and Food Network Magazine.

Ingredients:

For pies:

  • 3 cups all purpose flour
  • 1 cup unsweetened cocoa powder
  • 3/4 tsp baking soda
  • 1/2 tsp salt
  • 3/4 tsp instant espresso powder
  • 1 1/2 cups sugar
  • 1/2 cup butter
  • 2 eggs
  • 1/4 cup veggie oil
  • 1 1/2 tsp vanilla extract
  • 1 1/2 cups milk
  • 1 cup chocolate chips

For filling:

  • 8 ounces cream cheese, at room temp
  • 3 tablespoons unsalted butter, softened
  • 2 1/2 cups confectioners’ sugar, sifted
  • 1 vanilla bean, halved lengthwise and seeds scraped

Possible add-ons if you’re feeling adventurous:

  • Crushed vanilla wafer cookies
  • Crushed graham crackers
  • Crushed Oreos
  • Chopped nuts (pecans would probably be best)
  • Toasted coconut
  • Sprinkles of any sort
  • Mini chocolate chips

No, you do not need all of these toppings. I actually just used the vanilla wafer cookies. Use however many or however little you want.

Let us begin.

First, the cakes-

Preheat oven to 350 degrees F, or preheat a convection oven to 315 degrees F.

In a separate bowl, combine all of the dry ingredients (flour, cocoa powder, baking soda, salt, and espresso powder).

In a large bowl of an electric mixer, beat the sugar and butter until creamy and fluffy. And eggs and beat until well combined. Add the oil and vanilla and beat again. (I feel like singing Michael Jackson’s “Beat it” because of the number of times I said “beat” in the past sentences)

.Add half of the dry mixture to the egg mixture and beat or stir to blend. Add 3/4 cup milk and beat again. Add the remaining dry mixture and beat until incorporated. Add the remaining 3/4 cup milk and beat until blended. Stir in the chocolate chips

With a spoon, scoop out the batter onto baking sheets. I did about a tablespoon per pie, maybe a little more. With these sized whoopie pies, I was able to get 12 pies on an 11ishx16ish baking sheet. So unless you have a super huge oven and a gazillion baking sheets, you will need to do multiple rotations for baking them. But it’s worth it. Bake for about 6:30-7 minutes, or until a knife stuck in the middle of a pie comes out with moist crumbs attached or clean. Really be careful with the baking time; they go from nice and moist to overbaked and dry in the matter of a minute.

IMG_3670  IMG_3671

Once out of the oven, let cool slightly on the baking sheet, then transfer to wire rack to cool COMPLETELY before filling

IMG_3672

Speaking of filling….

Procedure for vanilla cream-cheese filling

Beat the cream cheese and butter with a mixer until smooth. Beat in the confectioners’ sugar and vanilla seeds. Sandwich a tablespoonful of filling between 2 cookies; repeat with the remaining cookies and filling. Roll edges in add-ons. Refrigerate 30 minutes before serving.

IMG_3673  IMG_3675  IMG_3679

Enjoy!

pie: http://www.foodnetwork.com/recipes/foodnation-with-bobby-flay/whoopie-pies-recipe/index.html

filling: http://www.foodnetwork.com/recipes/food-network-kitchens/red-velvet-whoopie-pies-recipe/index.html?ic1=obinsite

Inside-Out German Chocolate Cake

Standard

IMG_3425

Happy birthday to me. Kinda. My birthday isn’t until July 30th but I’ll be away then so we usually celebrate it beforehand with our greatest family friends. We went to an Italian restaurant in town where I had mozzarella on mozzarella on mozzarella. Do you know how long it’s been since I’ve had cheese? It’s been a very, very long time. It’s also been a very, very long time since I’ve made and/or had cake. Like, a good cake. We have cake sometimes at rowing for various peoples’ birthdays and they’re awesome (there was this one ice cream cake recently aghh omnomnom) buuuut they aren’t exactly homemade in MY kitchen. So. I made my own birthday cake. Yes. I make my own birthday cake. Yes. I realize it’s weird. No, I don’t care. Because baking is therapeutic and lovely and when you’re making a cake with chocolate, coconut, and pecans, the opportunity to snack is constant. Which is always awesome. This Inside-Out German Chocolate Cake from Gourmet Magazine’s (yes, Gourmet!) March 2000 issue takes a long time, but each bite you get three textures: 1. the moist chocolate cake 2. the crunchy praline-like filling and 3. the smooth, frosting-like glaze. I literally could not stop eating it. It’s addictive.

Makes: 12 servings ish, 1 3-layer cake

active time: 1.5 hrs

total time (if you do it all in one day): 4.25 hrs

Ingredients!

For the cake-

  • 1 1/2 cups white sugar
  • 1 1/2 cups all-purpose flour
  • 1/2 plus 1 tbs unsweetened Dutch-process cocoa powder (I used half Dutch and half Hershey’s unsweetened and it worked fine)
  • 3/4 tsp baking powder
  • 3/4 tsp baking soda
  • 3/4 tsp salt
  • 3/4 cup whole milk
  • 6 tbs unsalted butter, melted
  • 1 large egg
  • 1 large egg yolk
  • 1 tsp vanilla
  • 3/4 cup boiling-hot water

For Filling-

  • 7 oz sweetened flaked coconut
  • 1 cup coarsely chopped pecans
  • 14 oz can sweetened condensed milk
  • 1 tbs vanilla

For Glaze-

  • 2 1/2 sticks unsalted butter
  • 10 oz semisweet chocolate (I used nestle chocolate chips)
  • 3 tbs light corn syrup

Gettin’ it goin’

The Cake:

Preheat oven to 350 F and oil cake pans. Line bottoms of pans with rounds of parchment or wax paper. Sift together sugar, flour, cocoa powder, baking powder, baking soda, and salt into a large bowl. Whisk together whole milk, butter, whole egg, egg yolk, and vanilla in another large bowl until just combined. This part of my mixture kind of got lumpy because the cold milk clumped up the melted butter, but it still turned out great so don’t worry if that happens to you too. Beat egg mixture into the flour mixture until combined. Add water and beat again until combined. The batter will be thin, don’t worry. Divide the batter among the cake pans (the layers will also be thin, so each cake pan doesn’t get too much batter) and bake in upper and lower thirds of the oven, rotating them 180 degrees and switching positions half-way through. The cakes are done when a toothpick/knife/whatever comes out clean, about 20-25 minutes. Cool layers in pans on racks for 15 minutes, run a thin knife around the edges if needed, and flip ’em onto racks. Carefully remove parchment paper and cool completely.

IMG_3383   IMG_3385

IMG_3386   IMG_3387

The Filling:

Reduce the oven temp to 325 F. Spread the c0c0nut on a baking sheet and the pecans on another. Bake pecans in upper third of the oven. and the coconut in the lower third. Stir occasionally, until all nice and toasted (pecans will be golden brown ish and will release a nutty odor, coconut will be golden brown.) ***THIS IS SUPER IMPORTANT AND I MAKE IT CLEAR IN ALL OF MY POSTS. Toasting coconut is awesome but when you go to stir it, BE CAUTIOUS. Coconut oil is released from the shredded coconut and the vapor is in the oven. When you open the oven, guess where the vapor goes? Your eyes. It hurts a lot. So when you go to stir the coconut, open the oven, wait like 10-15 seconds, then stir. Anyways, it should take about 12-18 minutes in total. Remove the pans from the oven.

IMG_3388    IMG_3389    IMG_3390

Increase the oven temp to 425  F. Pour condensed milk until at least a 9 inch deep-dish pie plate (I used an 8x11ish rectangular pan and that worked) and cover tightly with foil. Bake the milk in a water bath in the middle of the oven for 45 minutes. Refill baking pan with water (just pour more in) to reach halfway up the plate/pan and bake milk until thick and golden brown, about 45 minutes more. Remove pie plate from water bath. Stir in coconut, pecans, and vanilla and keep the mixture warm, covered with foil.

Make the Glaze while the milk is baking if you choose:

Melt butter in a 3-quart saucepan. Remove pan from heat and add chocolate and corn syrup, whisking until chocolate is melted. Transfer 1 cup of glaze to a bowl, reserving remaining glaze at room temp in pan. Chill the glaze in a bowl, stirring occasionally, until thickened and spreadable, about 1 hour.

IMG_3391    IMG_3392

Assemble the Cake:

Put 1 cake layer on a rack set over a baking pan, to catch the excess glaze. Drop half of coconut filling by spoonfuls evenly over layer and gently spread with wet spatula/back of spoon. What I found was that the filling was actually workable so I spooned it onto the cake but I was able to flatten it out with my fingers. Top with another cake layer and spread with remaining filling in the same manner. Top with remaining cake layer and spread chilled glaze evenly over top and side of cake. I realized that the chilled glaze doesn’t cover the cake completely, so just try to get a very thin layer over all of it. But don’t worry if there are some small patches without the chilled glaze. BECAUSE. You now spread the reserved glaze over the top and sides of the cake. This is where you make sure the whole cake is covered. Chill the cake until firm, about 1 hour. Transfer cake to a plate. Make sure to bring to room temp before serving.

IMG_3393   IMG_3396   IMG_3399 IMG_3403   IMG_3424   IMG_3428

The order of which I did thing: I made the cake Tuesday night and froze them until Friday. I made the filling Thursday night and warmed it up Friday when I needed it. I made the glaze Friday and put it all together.

The Candy Cookie

Standard

IMG_3376

Last night, I was in a mood. You know those moods? Like, irritable beyond a ridiculous point where you’re just like insane and no one can speak to you. Luckily, I do indeed know how to get out of these moods when I’m in them. The answer: baking. I hadn’t actually baked anything  delectably sweet for a while. I mean, yeah dinner foods rock, but I needed to go back to my unhealthy, blood clogging roots of chocolate, chocolate, and more chocolate. Good thing I had an excuse to make food; my rowing team is getting back from two back-to-back races so they’ve all been gone for more than a week. I unfortunately could not go because a summer school program pinned me down at home. It’s been awfully lonely and quiet at the club, so I figured I’d do a little welcome-home baking by making something sweet. Last time I checked my Bingefest Brownies were a favourite. So I had every intention of making them. But I had  dilemma. Those brownies require like, 4 cups of crushed graham crackers for less than 20 brownies. And All I had were 6 graham crackers. That is not sufficient for more than 4 cups. So. I had this idea. I have graham crackers I need to use. I have m&ms I need to use. Thus, the candy cookie was born, as a play off of my brownies! There are three parts to this cookie: the chocolate slice cookie, the caramel, and the candy topping. The recipe itself is as easy as pie (although, truth be told, making pie is very difficult. It’s as easy as pie in the expression sense that everyone uses it in. It’s a dumb expression though because making pie is really hard. Okay okay point is, the actual baking of the cookie and caramel is indeed easy.), however, the assembly can be a bit of a hassle. But let me tell you: I took one bite into these cookies, and it was all. worth. it. It’s like the love child of a s’more and a caramel candy. It is. lovely.

Ingredients:

For the cookie:

  • 1 1/2 cups flour (whole wheat or all purpose)
  • 1/2 tsp baking powder
  • 1/2 tsp salt
  • 1/2 cup unsweetened cocoa
  • 8 oz (2 sticks) butter
  • 3/4 cup sugar
  • 2 tsp vanilla extract
  • 1 egg
  • 1 cup chocolate chips
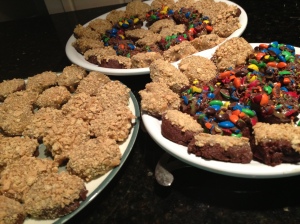
  • toppings: 1 cup chopped m&ms, 6 crushed graham crackers, coconut, whatever you like really

For Caramel:

  • 6 oz butter, diced
  • 1 14 oz can of condensed milk
  • 1/2 cup sugar
  • 3 tbs light corn syrup

Procedure

Cookie:

Combine the flour, salt, baking powder, and cocoa in a small bowl. Set aside.

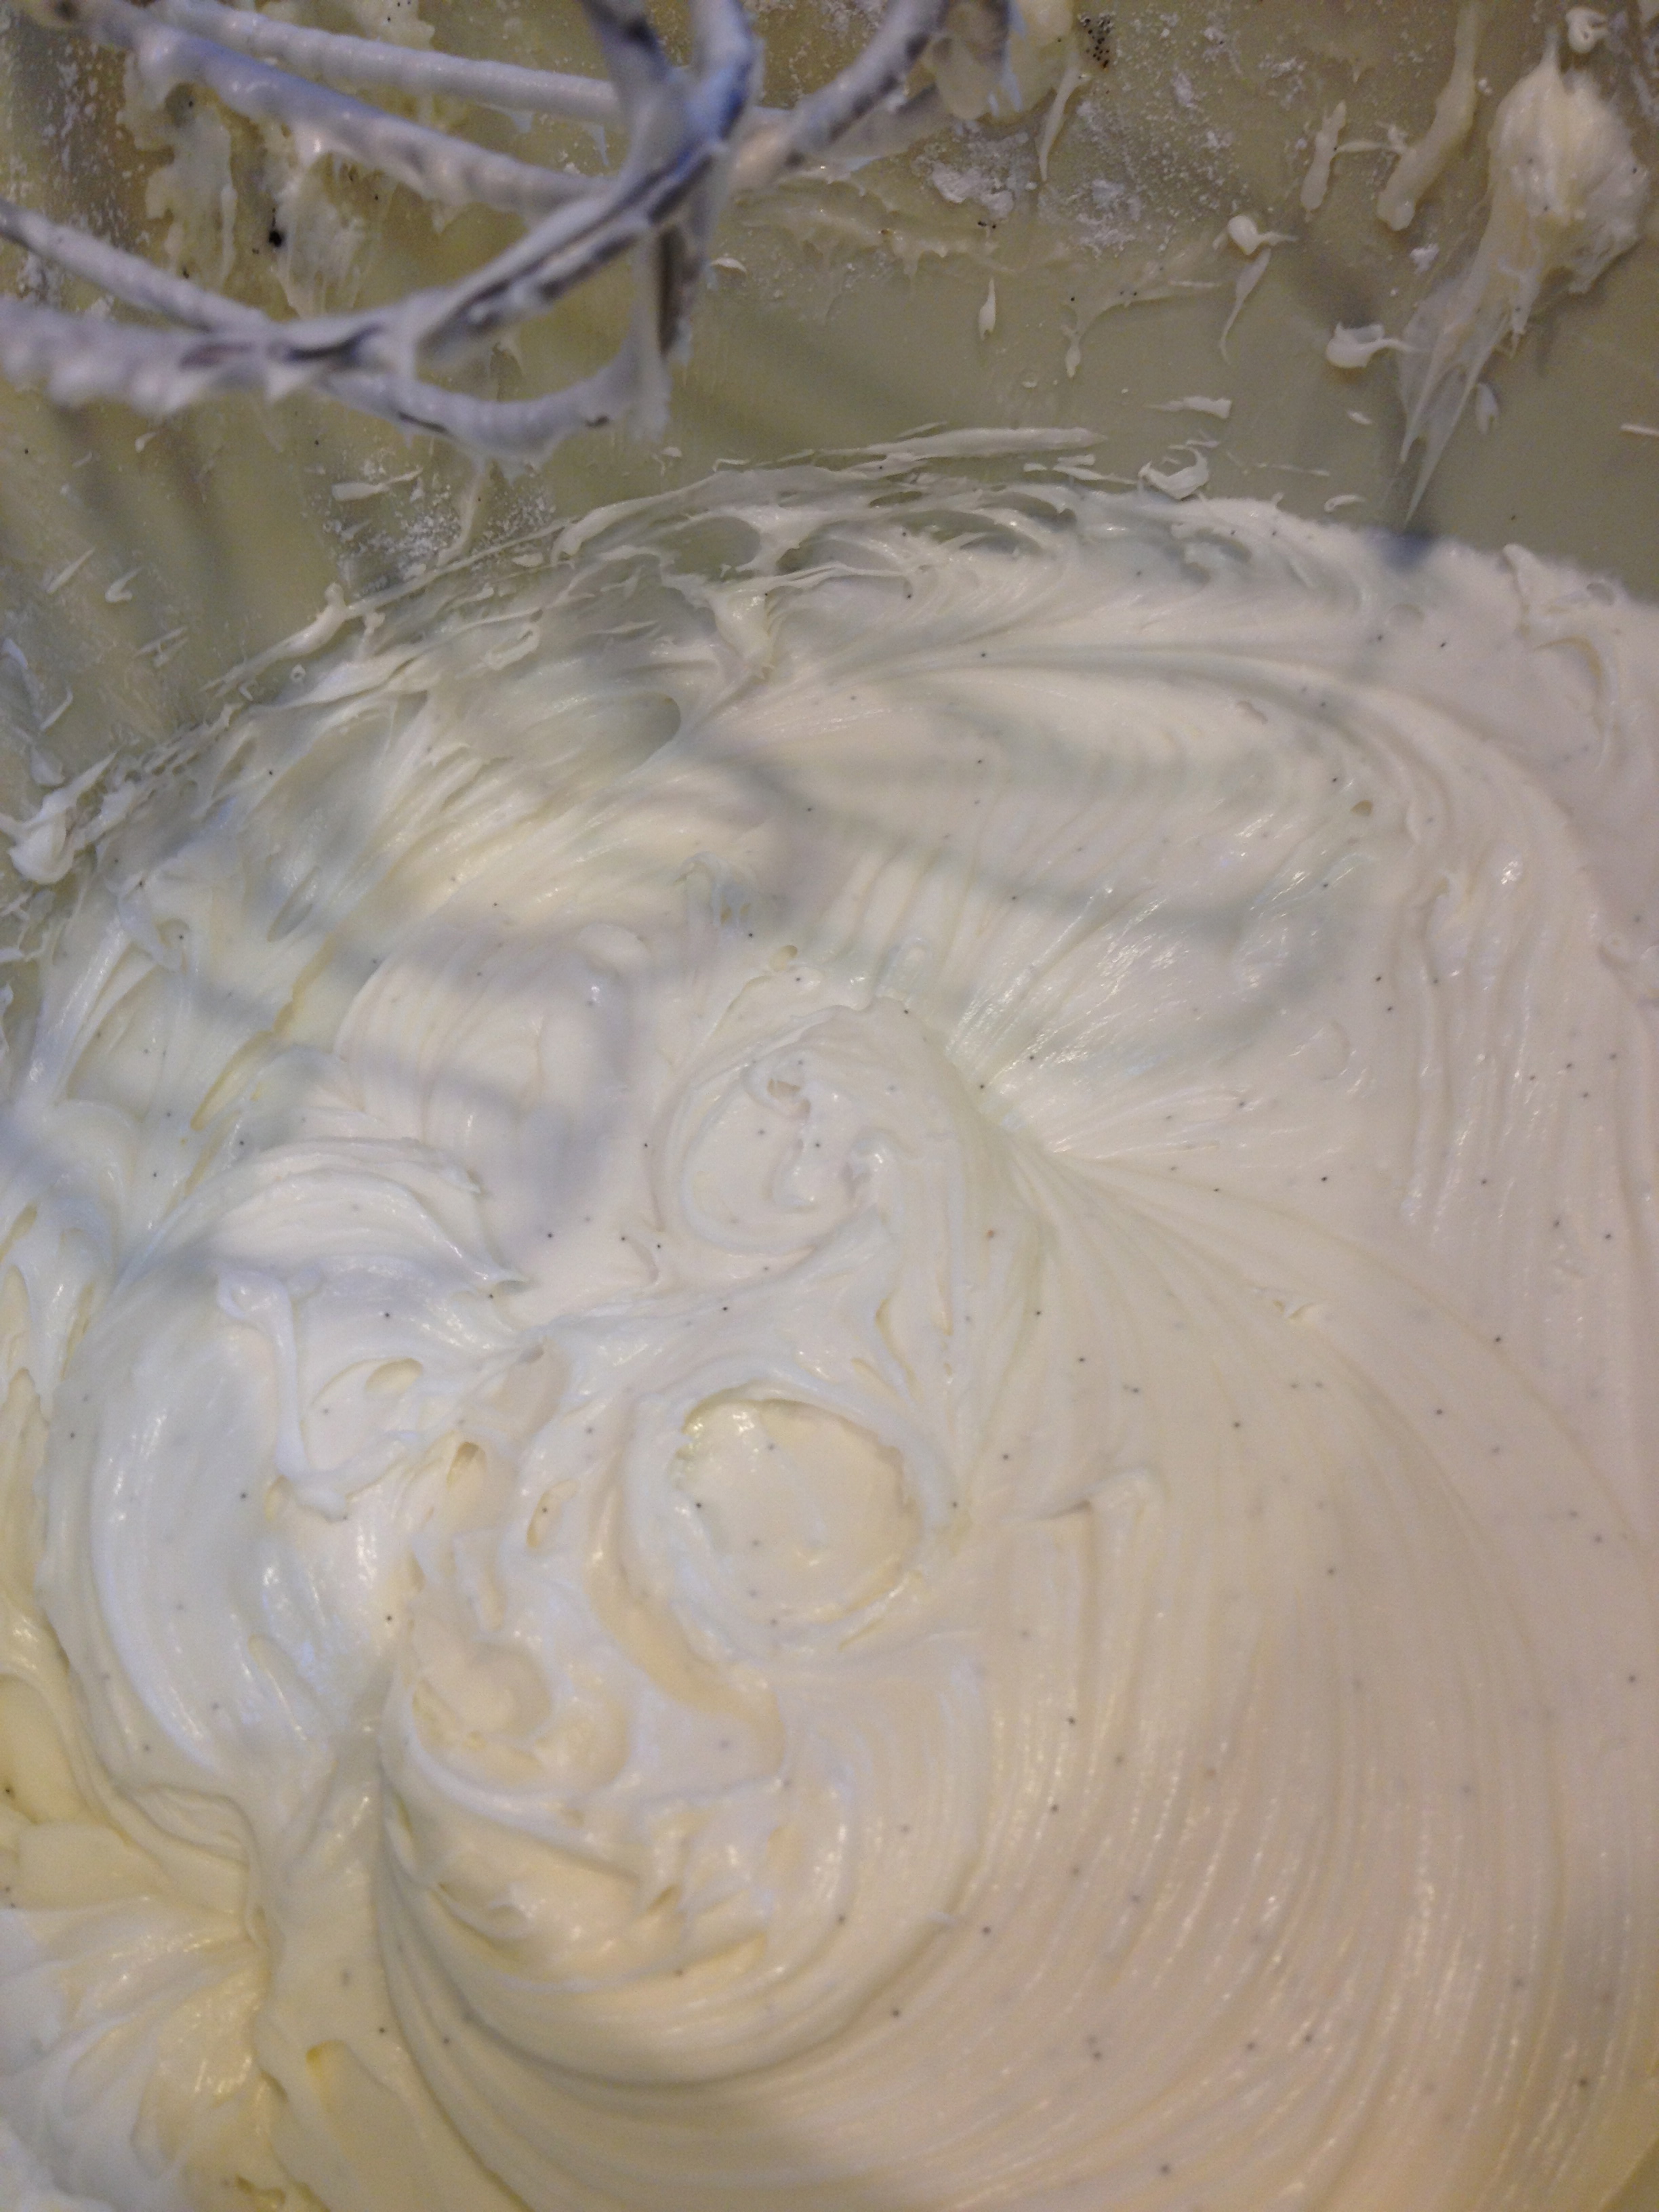
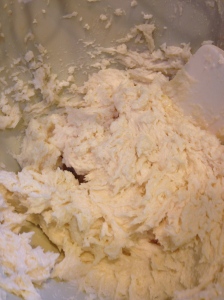
Mix the butter and sugar in a separate large bowl until creamy. Add the egg and the vanilla. Beat to make sure the batter is consistent with the new addition. Add the flour mixture. Beat on low speed until the the dry is mixed in evenly with the wet ingredients. The batter should go from being a light cream color to a very dark chocolate color. It should also be pretty doughy- hard to mix. Once you reach that consistency, add the chocolate chips to mix in.

IMG_3347    IMG_3349

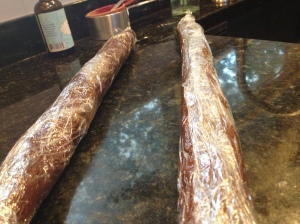
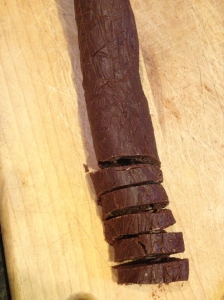
Now what you’re going to do is  take saran wrap and lay it out, about 9×15 inches. Scoop up half of the batter. If you made the batter correctly, it should be “workable”. You should be able to rolled the batter out into the log. What I do is I don’t roll it out ON the saran wrap. Instead, I roll it out with both of my hands and as it takes that log shape, I lay it down on the saran wrap. It should come out to be about…16-18 inches long, and 1-1.5 inches in diameter. You do two of these logs. Put them in the fridge for 2 hours or to speed up the process, the freezer for a half hour (that’s what I did). To make them fit in the freezer I just criss crossed them over each other like a x. At this point, the logs can be stored in the freezer for up to a month before baking! One of the many beauties of homemade slice-n-bake cookies. While waiting, get started on cleaning your kitchen. Trust me.

IMG_3350    IMG_3352

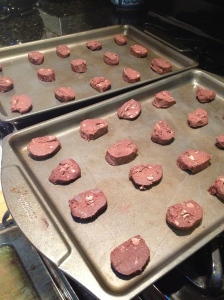
Preheat the oven to 350 F. After a half hour in the freezer or two hours in the fridge, get ONE of the logs out. Slice it into cookies that are about 1/3 of an inch thick and lay them on an ungreased cookie sheet. I was able to lay 20 on a 12×18, and got 35 I think out of one log. It may be a little hard to cut through the log at some points because of the chocolate chips but just force the nice through and if they fall apart you can smush it back together with your fingers. Bake for 10-12 minutes, or until the top is soft to the touch but the edges pull away from the bottom juuuust a tad. Don’t bake until hard, otherwise they. Will. Burn. I did them for 11:30 and they were perfect. Let cool on sheets for 5 minutes, the transfer to wire rack for cooling. Repeat the process with the other log.

IMG_3356    IMG_3358

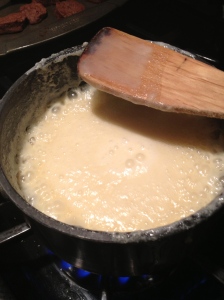
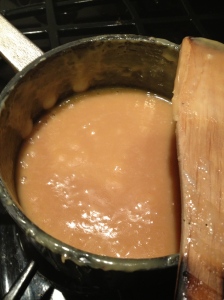
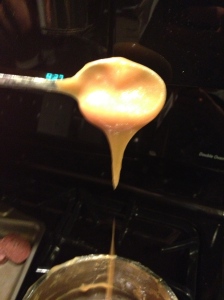
Get started on the caramel. All you have to do for this is throw the sugar, butter, syrup, and condensed milk in a small-medium saucepan. Heat gently until the butter melts and the sugar dissolves. Bring to a boil. Then, reduce the heat so that the mixture is simmer. Let it simmer for 6-8 minutes, or until darker in color and thicker. Stir occasionally.

IMG_3360 IMG_3361 IMG_3367

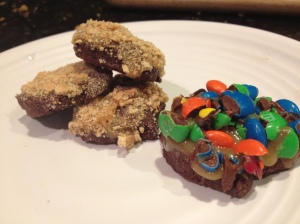
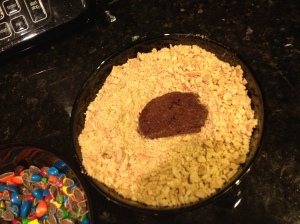
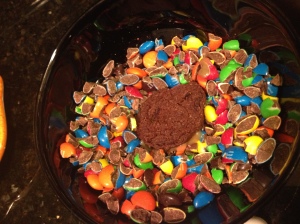
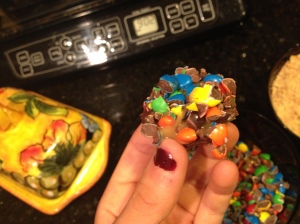
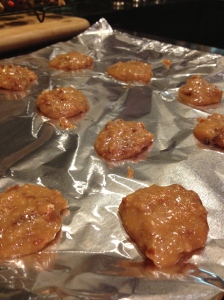
Once your have all the cookies racked and the caramel’s all done, time to chop up the m&ms and crush the graham crackers! Once they’re nice and crumbly, spoon about a teaspoon of caramel onto a cookie. Then, turn the cookie caramel-side-down into the desired topping. Making sure it doesn’t get crazy-candy-y on the sides, otherwise you’ll end up creating more work for yourself in the clean up process.

IMG_3354     IMG_3362 IMG_3363     IMG_3365 IMG_3364     IMG_3366

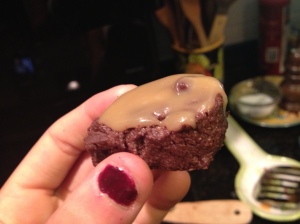
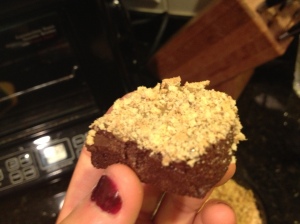
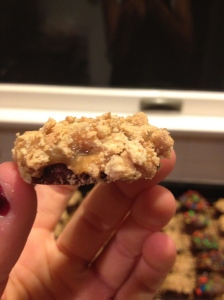
Take a bite. Fudge. Sweet caramel. Then crunch. Entirely worth every bit of effort. And take a gazillion pictures.

IMG_3378    IMG_3371

I mayyyy or may not have combined the extra caramel, crushed graham crackers, and some coconut to make little cluster candies…stick em in the freezer. Mmm. Home-made caramel candies.

IMG_3370

Sweet tooth to the max.

Credit for cookies: Cookie Swap Cookbook

Caramel: Best Ever Chocolate Cookbook

Coconut Brownies

Standard

IMG_3265

So if you don’t know already I’m in love with chocolate and toasted coconut. So. What better way to incorporate both of those lovely foods than coconut brownies? I thought of this for Independence Day because my friend told me to make brownies and I was like “I can’t make just plain brownies!” SO I immediately flipped through my Hershey’s Chocolate Cookbook for some brownie recipe. So I found a brownie recipe, modified it, and added coconut. And success. So. I must share this recipe. Make it. Now.

Ingredients:

  • 1 stick unsalted butter, softened
  • 1 cup white sugar
  • 1 tsp vanilla extract
  • 2 eggs
  • 1/3 cup unsweetened Cocoa
  • 1/3 tsp baking powder
  • 1/4 tsp salt
  • 1.5  oz unsweetened chocolate
  • 1 tbs whole milk
  • 1/2 tbs heavy cream
  • 1 cup toasted coconut, plus extra for sprinkling

Procedure:

Preheat oven to 350 F. Lightly grease 8-9 inch square baking pan. Stir flour, cocoa, baking powder, and salt. Set aside. Beat butter, sugar, and vanilla in large bowl. Add eggs.

IMG_3253

Beat well. Melt 1.5 oz of unsweetened chocolate, whole milk, and heavy cream in the microwave until smooth when mixed with a spoon. Make sure it doesn’t burn, so I’d say microwave it for 30 seconds. Then maybe at 15 second intervals if it’s still not mixed together. It doesn’t make a lot of melted-chocolate mixture, but it makes just enough to make the brownies chewy but moist. Add the chocolate mixture to the butter mixture. Mix immediately with beater to make sure the hot chocolate mixture doesn’t curdle the eggs (aka, make them scrambled eggs).

IMG_3255

Add the flour mixture to to the butter mixture. Add the coconut and mix until well incorporated. Pour into baking pan and bake for about 20 minutes, or until a toothpick inserted in the middle comes out with some moist crumbs attached. Note: A trick I do is that if it’s not baking/a crust forms on the top, score it. Ya know, punch little lines in the top. It’ll bake, and it’ll make the perfect fudgey brownies. Let sit for 15 minutes, flip, then cut into squares. Eat.

IMG_3262           IMG_3264

Fried Ice Cream

Standard

So. Yeah I like healthy food. By no means does that mean I don’t LOVE making unhealthy stuff, as seen in some of my previous posts. I was sifting through various food magazines (namely Bon Appetite and Food Network) searching for  a dessert to make for a dinner partyish thing. And I saw this. “MOOOOOOOOOOM LOOK WHAT I FOUNDDDD!” Behold, in Food Network Magazine of July 2013, it was Fried Ice Cream! This was a wonderful discovery, as it brought back happy memories. My mom is from Colorado, and my grandparents still live there. It is quite possibly the best state ever. So anyways every summer I go back there to visit. I think two summers ago, my grandma took me to this restaurant called Casa Bonita. It’s this hilarious restaurant with an indoor cliff/ pool thing and the servers are nuts and so on and so forth. You go there for the experience…not the food. Except. They do have pretty awesome fried ice cream. So that’s where I became familiar with this treat, AND fried ice cream was an old favourite of my mom and grandma. So. Needless to say we both love it. So long story…long…we were happy to find a recipe for it!

IMG_3251

This whole recipe is about being Speedy Gonzales. You need to scoop/coat the ice cream balls quickly so it doesn’t melt, you need fry it quickly so that it doesn’t melt in the process, and you need to serve it quickly so that your guests and/or yourself can still experience that wonderful hot/cold combo. You may be wondering “Fried ice cream? How does that work? Doesn’t it melt?” NO it doesn’t! The center actually stays ice cold. When you cut into it, the cold ice cream hits the super hot outside and starts to ooze out into a puddle of chocolate. You take a bite. And in that bite, you get the cold ice cream, the crusty outside, and smooth chocolate sauce. Have I convinced you to try it yet? Yes? Good! Here’s the recipe:

Ingredients-makes 6 servings:

For the ice cream:

  • 2 pints of ice cream, any flavor (I used chocolate peanut butter and chocolate chocolate chip but literally any flavor works)
  • 3 cups panko breadcrumbs.***
  • 4 large eggs
  • 1 tbs vanilla extract
  • Vegetable oil, for frying. About 8 cups

For the sauce:

  • 8 oz bittersweet chocolate, either in chip form or chopped.
  • 6 tbs whole milk
  • 2 tbs heavy cream
  • 1 tbs unsalted butter
  • 1 tbs sugar
  • 1/2 tsp vanilla extract
  • pinch of salt
  • Optional: honey and cinnamon

***Note: Food Network makes this with panko breadcrumbs. But. Panko is usually used for more…dinner type meals. Not dessert. And I noticed that with panko, it kinda tasted a little too bready. I think that crushing up corn flakes would work just as well, if not better because it adds the crustiness without being too savory and not too sweet.

Assembly:

To prepare the ice cream, scoop 6 balls onto a pie dish, or whatever type of dish that will fit into your freezer. Freeze until hard, about 1 hour.

IMG_3221

Put half of the crumbs in a shallow bowl. In another bowl, whisk the eggs and vanilla until combined. Coat the ice cream balls in the egg mixture and allow the excess to drip off. Then, roll the ice cream balls around in the crumbs. Return to the freezer until firm, at least another hour.

IMG_3223           IMG_3227

Then, an hour later, you’re going to do the same thing again. Refill on the crumbs by adding the other half to the shallow bowl. Roll the balls in the egg mixture, then the crumbs. Return to the freezer for at least another hour. Food Network notes that at this point, you can wrap the breaded ice cream in plastic and freeze it for up the three days.

Screen Shot 2013-06-29 at 10.45.47 PM

To make the sauce: combine 4 oz of the chocolate, milk, heavy cream, butter, sugar, vanilla, and salt in a microwave safe bowl. Heat in 30 second intervals until you can stir it around and it’s smooth. Now this is where I ran into a problem. See, I had chopped up the 4 oz of chocolate. But when I heated it, it just was not coming together in saucy chocolate smoothness. So what did I do? I added chocolate to the hot mixture until it became thick and smooth. Because the mix was hot, the added chips just melted in it naturally. They acted as a thickening agent and a sweetener. You can make this sauce as thin or as thick as you like; I personally wanted it thick which is why I added more chocolate. But if you like soupier, just don’t add as much chocolate after the heating; I’d say about 2 oz in addition to the original 4. Drizzle the chocolate in bowls.

Screen Shot 2013-06-29 at 10.46.28 PM              Screen Shot 2013-06-29 at 10.46.40 PM

This is the fun part: the frying. Heat about 2 1/2 inches of veggie oil in a heavy bottom pot over medium high heat until a candy thermometer registers 400 F. Fry the frozen ice cream balls, two at a time, until the coating is golden brown (about 30 seconds.) Remove with a slotted spoon to allow the excess oil to drip off, drizzle with chocolate and optional ingredients and serve immediately.

Screen Shot 2013-06-29 at 10.46.52 PM          Screen Shot 2013-06-29 at 10.47.00 PM

New Orleans Double-Chocolate Praline-Fudge Cake from Southern Living

Standard

Chocolate on chocolate on chocolate. What could be better? Plus the praline? It’s like the sweet-salty smooth-crunchy cake. I actually have a funny story about this cake. See, I was making for the second time for my grandmother’s birthday, so it was late Decemberish. It’s a three layer cake. So. I had just finished baking all the layers and transferred them to wire racks. My mom moved them over to the window sill to cool.

Bad idea. Window sills are not strong. So one of the layers ended up doing a bit of a flop on my deck. It’s a sad night when you have to demote a three layer cake to being a two layer cake. Good news is, my mom was making a vanilla cake the next weekend and the same thing happened to her ;). You would have expected us to learn our lesson. But no. Anyways, it made a fun couple of nights late night baking with mom. She taught me all I know about food and baking, so I always love being in the kitchen with her. Until we get in each other’s way. Then things can get a liiiiiitle tricky 😀 But that usually doesn’t happen.

Anyways, yes, the cake! One of the best cakes you’ll ever make! It takes a while to make it, but it is completely worth it. Without further ado:

Ingredients for cake:

  • 1 cup butter or margarine
  • 1/4 cup unsweetened cocoa
  • 1 cup water
  • 1/2 cup buttermilk
  • 2 large eggs
  • 1 tsp baking soda
  • 1 tsp vanilla extract
  • 2 cups white sugar
  • 2 cups all purpose flour
  • 1/2 tsp salt

Part 1: Assembly of the cake

Preheat over to 350 F. Grease the bottoms of 3 8″ round cake pans and line them with wax paper. Grease and flour the wax paper sides of pans. So basically it’s butter-wax paper-butter-flour.

Cook the butter/margarine, cocoa, and water in a heavy bottom metal pan over low heat, stirring constantly, until the butter melts and the mixture is smooth. Remove from the heat to cool. Beat the buttermilk, eggs, baking soda, and vanilla with a mixer until smooth. Add the butter mixture to the buttermilk mixture, beating until blended ***remember, the butter mixture should be cooled off before you add it to the buttermilk mixture. If not, the eggs will curdle. Scrambled eggs are bad in this case.*** Combine the sugar, flour, and salt, gradually add to the buttermilk mixture. Beat until thoroughly blended. Southern Living warns that the batter will be thin, and that’s okay. Just pour the batter evenly into the prepared pans. Bake for 20-22 minutes or until a toothpick inserted into the middle of the cakes comes out clean. Let sit in pans for a little bit before flipping them out, about 10 minutes. Then flip em, remove the wax paper, and cool completely on wire racks. Tip: don’t put them in the windowsill. The layers will be thin but that’s okay because there’s also the chocolate ganache that goes between the layers to fill em up a little bit. Speaking of which…

Ingredients for chocolate ganache:

  • 2 cups (12 ounces) semisweet chocolate morsels (aka chocolate chips)
  • 1/3 cup whipping cream
  • 1/4 cup butter or margarine, cut into pieces.

Part 2: Making the ganache

Microwave the chocolate morsels and cream on medium for 2-3  minutes until they are melted. Check the chocolate chips as they heat in the microwave to make sure they don’t burn! Stir until all the morsels blend together and they are smooth. Gradually add in the butter, whisking until smooth. Cool, whisking often, for about 25 minutes so the ganache reaches spreading consistency. It should yield about 2 cups. This is where you start putting your cake together! Once the layers are cooled, put it together by laying one layer out on a plate, put some chocolate ganache on top, then comes the other layer, ganache, then the final layer, ganache. Don’t use too much for the filling because you still need to have enough ganache to frost the outside!

Ingredients for Praline Frosting:

  • 1/4 cup butter or margarine
  • 1 cup firmly packed light brown sugar
  • 1/3 cup whipping cream
  • 1 cup powdered sugar
  • 1 tsp vanilla extract
  • 1 cup chopped pecans, toasted**

Part 3: Making the praline.

**Note on how to toast pecans. Set the oven to 350. Chop pecans. Roast them for about 5 minutes, but keep an eye on them because they burn really easily really quickly. Take out of oven and let cool.

Bring the butter, light brown sugar, and whipping cream to a boil in a heavy bottom pan. Stir often as it boils for about 1 minute. Remove from heat and whisk in the powdered sugar and vanilla until smooth. Add the toasted pecans, stirring gently for 3-5 minutes or until the frosting becomes cool and thickens slightly. Pour the frosting over the cake immediately. Let the frosting harden a little before serving.

Screen Shot 2013-06-25 at 12.02.23 PM

Heart Attack Brownies

Standard

It was a dark, story day in late January. Actually, it was really sunny. But. It was a bad day. Why? CT indoor sprints. Death. Evilness. Bad bad bad. For those who don’t know, the way rowers train on land is with a very devilish piece of machinery called an ergometer, aka, an erg. Since we can’t go on the water in winter (as usually the river freezes), we are trapped on these things. And on them, we have to do painful time trials to see how fast we can row 6k or 2k. The CT indoor sprints is a 2k erg race. So basically there a bunch of these lined up in the middle of a huge gym thing with risers for adults, an annoying announcer, and a bunch of people dying as they try to finish their race. The ONLY good thing about this event is that it gave me an excuse to try something new for the bingefest the team had after. And the new creation? Heart attack brownies. Artery clogging amazingness.

IMG_2299

See, I got the original recipe from Hershey’s Chocolate Cookbook. Buuuuut I changed a couple things. As in a lot of things. For one, I accidentally added…twice the amount of chocolate…haha whoops. I also added things like white chocolate chips and graham crackers. I mean if you’re eat a brownie that already has twice the amount of chocolate than it should, may as well go all out and totally dec it out.

Ingredients:

  • 1 3/4 cups all purpose flour
  • 1/4 cup unsweetened cocoa
  • 3/4 cup (1 1/2 sticks) unsalted butter
  • 1 egg
  • 1 can (14 oz) sweetened CONDENSED milk. Not evaporated. Evaporated is runny. Condensed milk is thick. THERE IS A DIFFERENCE.
  • 2 cups chocolate chips
  • 1 1/2 cup crushed graham crackers
  • 1/2 cup white chocolate chips

Assembly:

Heat oven to 350 F. Grease 13x9x2 inch baking pan. Sift together flour, sugar, and cocoa in large bowl. Cut in 1/2 cup/ 1 STICK of butter until the mixture resembles corse crumbs. This means to mush the butter into the flour mixture with your fingers and mix it all together until it resembles a crumby mixture. DO NOT use a beater. Add the egg, and mix well. Yes, now you are allowed to use a beater. Set aside 1 1/2 cups of the mixture, and press the remaining mixture into the bottom of the prepared pan. Bake for 10 minutes.

In the mean time, place the sweetened condensed milk and the chocolate chips in a double boiler. This is so the chocolate doesn’t burn. To create a double boiler, get a stainless steal bowl and a heavy bottom pan that holds 4-8 cups of liquid. Fill the heavy bottom pot with water, leaving about an inch from the top. Place the stainless steel bowl over the heavy bottom pot and MAKE SURE the water does not touch the bottom of the pan! If it does, dump some water out. And there. You have a double boiler! So place the chocolate and the condensed milk in the double boiler so it gets all melty and smooth. Pour over the crust.

Another thing you want to do is mix the crushed graham cracker crumbs with the remaining 1/2 stick of MELTED butter. Yes. Melt it. Otherwise it’ll be impossible to cover the graham crackers in butter. So yes combine that all. Then, sprinkle the mixture over the crust. Also sprinkle the remaining flour/sugar/cocoa mixture over the crust, and the white chocolate chips. Stick it in the oven for 25-30 minutes or until the center is almost set. Cool completely in pan then cut into bars. And eat.

IMG_2301